Pages

Wednesday, September 26, 2012

Mr. Bee's Tip of the Week: Easy-to-do tricks to keep your room clean

Due to the new room renovations, I've been looking for ways to keep my room the way it was when I was finished. We all want to sustain that "just cleaned" look, but are really just drowning in a sea of all our clothes. Yah, it happens. 

Luckily I've come up with this easy-to-do system for keeping my room in tip top shape. This is what you have to do:

PUT ITEMS YOU WANT GONE ON YOUR BED.
These are the things you are going to be putting away. 
Simple enough right? Right. It's your job however, to actually put these items away. Now, it's completely up to you when you want to do this, but at the end of the night, the only way you're allowed access into those comfy sheets of yours is if you put everything that's on your bed away first. Depending on the day this may not be very much, if anything at all. You can only get into bed though, once everything is gone. In refection it's very logical because you can't get into a bed with a bunch of stuff on it anyway... so, you might as well clean it up!

How do I make myself do it?
compromise.  
See all of those clothes you still have on the floor? Leave 'em there.
Only put away the items that are on your bed. Now, this doesn't give you an excuse to throw everything from your bed to the floor and never touch them again. Oh, no. This means that you can pick. You can choose from the clothes or objects on the floor and pick which ones to throw on your bed. How great is that? All you have to do is the little bend and toss from the floor to the bed. With this you get some procrastination time (not actually putting it away until before bed), and productivity (knowing that it's actually going to get done later). Whatever is left on the floor at this point is left for tomorrow's pickings. Over time, all this procrastinating-productivity adds up and you've got a clean room!    


X
Sarah

Monday, September 24, 2012

Painting Pleasures: Redoing your ugly university room

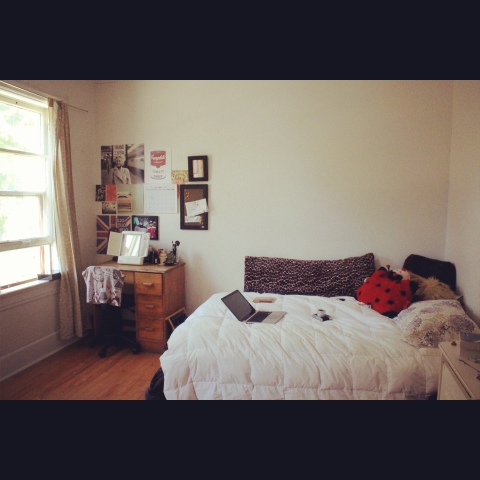
My main goal this summer was to redo my room. I don't know what it was, but there was just something about that red, blue, orange and beige combo that just wasn't doin' it for me. So, I began my quest for the perfect shade of white.

Naturally I wanted to get the cheapest paint I could, but after speaking with someone who actually knew what they were doing, I decided against it. It completely paid off too, because I only ended up doing one coat of both the primer and the paint! Trust me if this is ever an option, take it. You do not want to be doing any more coats of paint then you have to.

These are some pictures of what it looked like before:
BEFORE
Yah, something had to be done.
So, I went to work and just started painting.

I've never painted a room by myself before, so it was kinda of exciting figuring it all out. It's really not that hard either. All you need is the time to do it. That was the hardest part for me anyway. Another thing too is if you are in a hurry and under any sort of time constraint, use good paint. Only having to do one coat of each paint will gain you SO much time in the long run.

The way I did it was I would work on my room for a few hours a day (or night), so it took me about 2 or 3 nights to completely finish it. My schedule was still pretty full during that time, so I would dedicate a few hours here and there to painting, and was finished in no time! Mind you, I also had to spend a couple nights in my roommates room, so if you are planning on painting your bedroom, make sure you have somewhere else to sleep. Paint fumes aren't good air fresheners. I was lucky because she was away for the weekend, so I just took her bed. If no one else is gone though, you might have to end up sleeping on the couch. At least your pets might appreciate the company!

And here we have the finished product! Needless to say, it turned out much better then before.
AFTER


X
Sarah


Thursday, September 13, 2012

Mr. Bee's Tip of the Week: Understanding F-stops and Shutter Speeds

Starting out as a photographer is hard. For me the hardest part is learning all about the f-stops and shutter speeds and light and dark, blah blah blah. I'm still working on it myself, but by practicing and just playing around with it I've found this little trick. Now, it's nothing super secret and most of you may have already discovered it, BUT what I like to do is keep the video turned on while I'm adjusting the different settings. I have a Canon T3, which allows me to do that in any of the settings, be it for photo or video. By leaving the video on before I take a picture I can see the immediate changes I make when trying to set up the picture. If I start playing around with the f-stop then I can see exactly what that does to the picture as I do it. Same thing goes for changing the shutter speed, I can see how light or dark it's going to make the picture before I even take it. This has helped me tremendously in my process of trying to understand the confusion that is a DSLR camera. I've found that the two main photo adjustments to make are with the f-stop and the shutter speed. This is because they are the ones that revolve completely around how much light you will be letting into the lens/camera. For me lighting is the hardest part of taking a picture. I'm still in the learning process myself (as any of my roommates will tell you), so I don't have any tricks for that yet. I plan on finding some though, so stay tuned. 
This is a picture I found on Google that I though was a really good way to show how the f-stops (aperture) works. The thing to remember, but is also really confusing is THE SMALLER THE NUMBER, THE LARGER THE LENS OPENING. Confusing, I know.

It looks like this:
small f-stop = lots of light, more things in focus, larger depth of field
big f-stop = little light, less things in focus, smaller depth of field


x
Sarah

Monday, September 10, 2012

Pabst Blue Ribbon with Steak

Yah, this is what my day consisted of on Saturday. Needless to say, it was a good night. Not going to lie, the only reason I got this beer, besides it being on sale, was because it's in a Lana Del Rey song "Pabst Blue Ribbon on ice"... I felt as cool as it sounds. The taste was pretty good too. It's not a strong bitter taste, which is good because I'm not really one for dark or super bitter beers. So all-in-all it was a success and I give it two thumbs up for coolness factors.  
Sesame seed steak strips
I was having one of those "I'm feeling a down and want to eat away my sorrows" kind of moment, when all of the sudden I hear a "do you want any steak" come from the kitchen. I've never had my worries cured so fast in my life. NOT ONLY did my amazing roommate give me the steak, but she had delivered it to my wilting chamber of sorrows (my room). Then it turned into "this is why I love my roommates" moment. Moral of the story? Have an issue? Eat some steak. 

A South Korean Summer Vacation

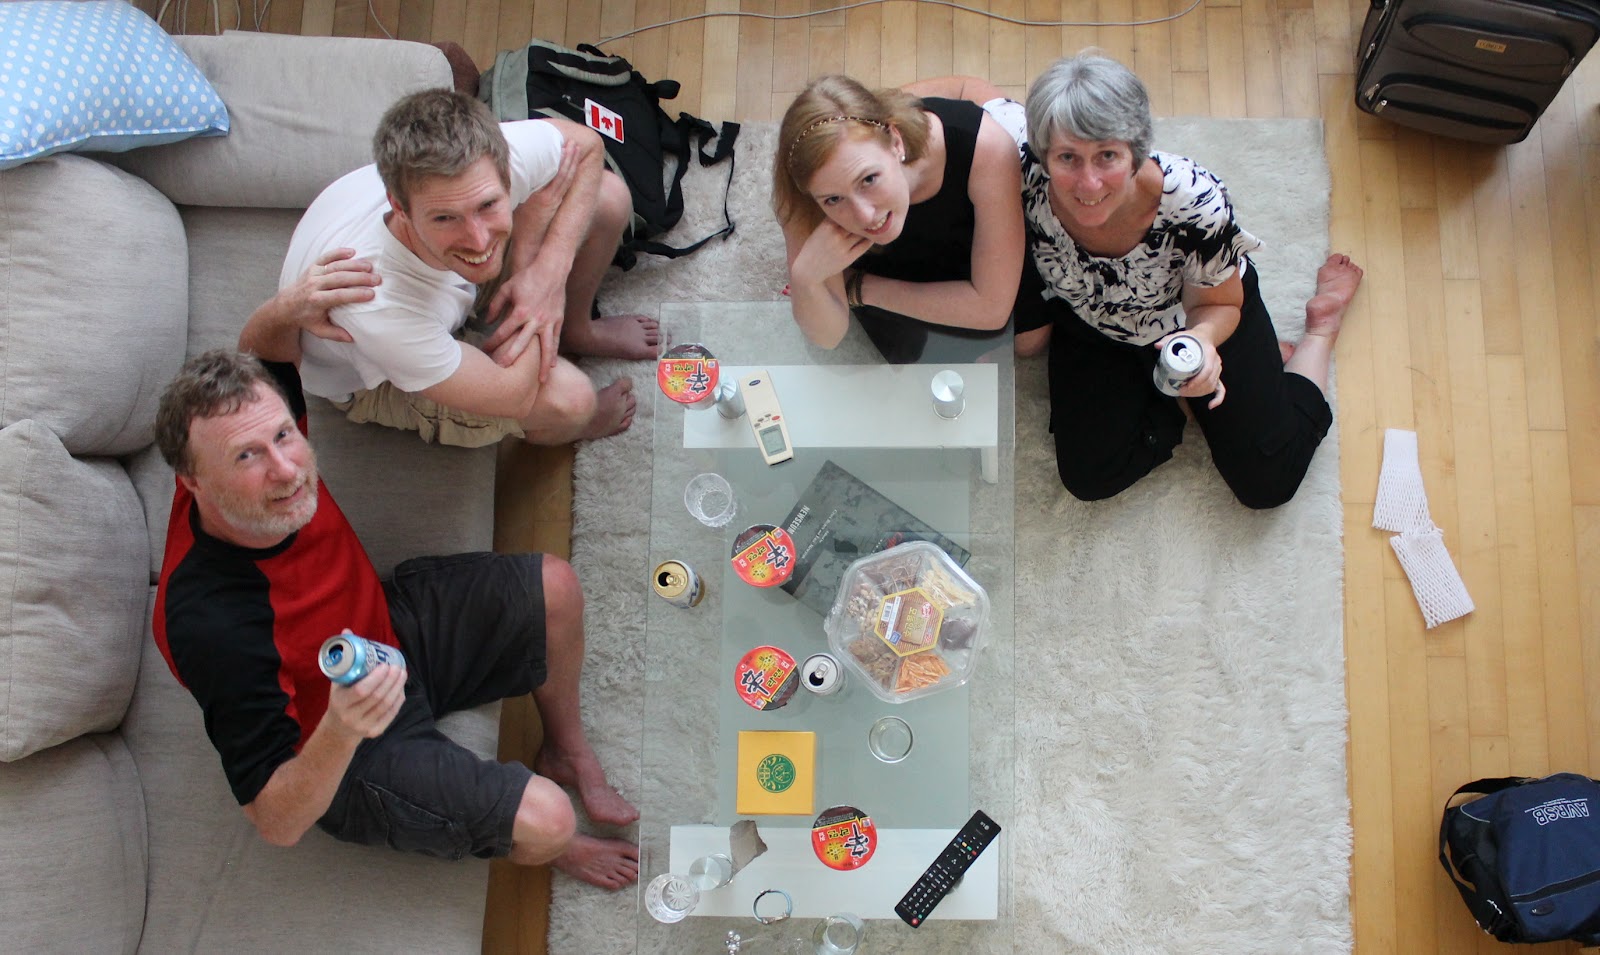
This summer my family and I went on a huge trip across the world to visit my sister who is teaching in South Korea. We went at the beginning of August and stayed for 2 weeks. Not only is this the longest my family has gone on a trip, but it's also the first time we've all gone on the plane together. We were excited. 
Stoked faces for takeoff 
The flight takes a full 24 hours to get all the way over there. There were 3 connecting flights that we took too. We went from Halifax to Toronto (2 hours), Toronto to Vancouver (5 hours), and then from Vancouver to Incheon, Korea (14 hours). We flew with Air Canada and I was actually super impressed by the service and timing and everything, which is surprising I know. But we got cool airplane food because we were an over night flight and we also got to have the snack for free too! Drinking red wine and eating Lindor chocolate was probably the highlight of the flight.  
My sister had Korean beer, noodles and dried squid at the ready when we arrived at her apartment. All things which I later found out to be VERY common amongst the streets of Korea. I gave in on the last day and tried some of this so called dried squid, and let me tell you, it was disgusting. Mind you, I don't like seafood anyway, but it actually was pretty gross. Dad didn't mind it though, so maybe there are some people out there who would like it. All I know is that I don't. 
We did A LOT while we were there too. Now, I know some of you might be saying, what is there to do in South Korea? WELL my friends, there's lots. We were there for a total of two weeks, did something every day and could have easily filled up another two. First we started out with a tour of Seoul and the Palace, then we went to Seoul Tower another day and got a 360 degree view of the whole city (really beautiful with an unexpected amount of big mountains surrounding the city.), we went to the school where my sister teaches, and went to an aquarium that was inside of an underground mall named Cotex. Yah, I said underground mall. These are only some of the activities we did too, other days were spent shopping, walking around, museums and lots drinking. 

The best things about the Korea trip as a whole, was the fact that everything was super cheap, all the translations were terrible and you can buy liquor at pretty much any store. I'm making myself sound like an alcoholic here, but there is just something about buying a 2,000 won ($2.00), beer at Family Mart (equal to Needs here), grabbing a table, and sitting out in public drinking with your friends and family. I think Canada could take a few hints from these guys, they're on to something.  
In addition to all the other things we did over the past coupe weeks, we also went to a baseball game and went to the UMF music festival to see Skrillex and Steve Aoki. The Baseball was amazing, with people cheering literally the entire time. It was like nonstop background noise with loud thunder sticks and choreographed dance moves. 

The concert was nothing short of amazing either. My friends made me bring their pictures so that they could be a part of the excitement too. I was happy to have the company. Skrillex seemed pretty excited too. You know it's a good concert when you leave having a different color shirt then the one you came with. I swear I danced so hard I will never have to exercise again. Worth it. 
The fashion there is another thing all in itself. It was such a shock being from Canada, a culture where women don't really dress up unless you have to, to Korea where the girls wear 4 inch heels to go to Family Mart. Everyone dresses very respectfully and always look presentable. I didn't wear pants the whole time I was there because A) it was wayyyyy to hot, and B) you almost feel as if you have to. I love dressing up though, so for me it was just an opportunity to wear all the dresses getting dusty in the closet. Another thing too is that because there's so many people there, anything goes. I could have worn anything and it would have been fine. I may have gotten a couple stares, but no more then the regular ones you get for being a non-Korean. There may be a lot of people, but there isn't much diversity. 

I actually kind of liked being the minority for once. As a Caucasian female I don't really get to experience that very much. By the end of the two weeks the stares and lack of personal space were getting to be a bit much, but all in all being in Korea was an experience I won't soon forget.    


X
Sarah   

Monday, August 27, 2012

St-Hubert Express Pass to Fredericton


St-hubert Express, Fredericton NB.
Yesterday I met with the owner of the brand new St-Hubert Restaurants here in Fredericton, NB. His name is Barry and co-owns the eatery with his brother Denis Pope. After not having a day off since they opened, Denis was home for some much needed relaxation. Barry however, had things in full swing with clean surfaces, great employees and a smile to match.

Not only is St-Hubert new to fredericton, but so is Barry. Coming over from Halifax he started on a great foot with the help from his brother Denis. From what I could see everything was in full swing and the place was in tip top shape. Now this may also have been because the place is brand new, but hey, its the small things that count.

Inside dining area.
By constantly being on the lookout for new business opportunities, brother Denis found the sign for an opening at St-Hubert on a government business website, and seized the chance. After having his brother on board and the ok from the experts, the duo went ahead and joined the metropolis of new businesses coming to fredericton.

Inside and outside of the building. 
This was my very first experience with St-Hubert, so I had no idea what to expect going into it. Just a couple days ago however, I received the St-Hubert menu in my mailbox, conveniently timed for growing curiosity. I took a peak and it didn't look too bad. It basically reminded me of an everyday fast food chicken place. Mind you, that's not always a bad thing because you know their chicken is going to be good. Anyway, I couldn't help but be shocked when I drove up to the actual building. It wasn't your old classic chicken shack like I was expecting, instead it was a very modern design with almost a Boston Pizza feel to it. It has nice tables with big umbrellas if you like to eat outside and a glass fence to keep it all together. The inside was even better. It is a very modern look with classy mirrors, paintings and flatscreen tvs illustrated across the walls. Everything looked new (as it should) and well put together, which for me, is a definite plus.


Possibly one of my favourite qualities of St-Hubert was how well organized they are. I am a very organized person myself and took a huge appreciation for both their ordering system as well as their garbage disposal.

As a walk in customer you follow a sign to the right side of the ribbon and for take out or pre-ordered meals you go over to the left. This way everyone doesn't have to wait in the same line and you don't get a jumble of people.


The garbage is my favourite part. What they do is have you bring your tray of food over to what they call their "Eco Station". At this point workers take over and sort your garbage for you. Instead of cleaning your plate and worrying about putting the right piece of waste in the right container, St-Hubert does it for you. This way it gets done right every time and and you (the paying customer) don't have to worry about a thing. You simply drop your tray off and hit the road! To me, this is great. All of the waste is being sorted the way it should and you don't have to lift a finger. For those who know me, know that dishes and I are not friends. St-Hubert and I, on the other hand, now are.


Now for the part you've all been waiting for: the food. They have a variety of different meals you can get, as well as the classics everyone loves. It has every type of meal you can think of, chicken wise. There is something for everyone too, whether your eating by yourself or you have a family to feed. You could get anything from a hot chicken sandwich to a family pack meal. I have a link to their menu at the bottom of the page if you would like to check it out and see what you can find! (I was so busy eating mine that I completely forgot to take a picture! Crap...)

http://www.st-hubert.com/menu/envedette.en.html

Something you can't find on the website, is the presentation of the food. All meals are served on a tray with a plate and fork. It gives a nice "going out to dinner" feel without having the wait or the waiter. I'm a plain Jane type of girl when it come to ordering out, so I decided to get the Chicken Breast Fillet Wrap. It came with two halves of a wrap, your choice of side (French fries, baked potato, sweet potato fries, rice pilaf, julienne vegetables, Caesar or garden salad), naturally I went with the unexpected French fries, coleslaw and a choice between fountain or bottled pop. Everything was really, really good but you are somewhat paying more for quality rather then quantity. All in all (the presentation, the good chicken, and fast service) was awesome, BUT I really was expecting just a littleeee more chicken.

If you've read anything on my blog before you know that I'm always looking for a bargain. St-Hubert is reasonable in their pricing considering the quality of the chicken and the presentation/service that you get. My meal came to a little over $12.00 in total, which really isn't bad for good quality chicken and a nice place to eat (especially where you don't have to clean off your dishes).

At the end of the night I left feeling like a million bucks with a full stomach. When it comes down to it, what more could you really ask for?          
:)


X
Sarah                                                                                                                                                                                                                                                                                                   

Monday, August 6, 2012

D.I.Y. Stencil Poster

Recently I've been Pinteresting like it's my job. I came across this really cool D.I.Y. That I've been wanting to try for myself and so just a couple weeks ago I actually did it! I used a couple different materials, but I found that they were A) cheaper then the original and B) worked just as well if not better then the original, so all-in-all it turned out to be a success!


Here is what I used:

Adhesive foam sheet - Michael's
Paint Brush (small and large)
Ruler
Paint (I chose white) - Dollar Store
Scissors
Painting of your choice - Value Village


Steps:

1) Pick a painting. For mine, I went to Value Village and chose one of the most colorful landscape pictures I could find. This is good because you know that later for the finished product the letters and words are going to stand out and add a nice contrast to the color your going to be adding. You also want to look for a picture or painting that you don't really care for. This is because in the later steps your going to be painting over it with your own design, so whatever is in the background won't really matter. This is the one that I chose:

(I got lucky because I found both a cool frame and a colorful background)

2) Pick the phrase you would like to use and cut the foam to the desired letter and words. This is where I found the advantage to using the adhesive foam rather then the pre-made letter stickers because this way you can cut them to whatever shape and size you want. With other stickers you may find that they are too small or too big, but here you are in complete creative control. The phrase that I picked was, "Born to Die". I chose this because it's the title of the latest Lana Del Rey Album that my roommates and I have recently become obsessed with, and also because it's such a thought provoking sentence that I can't seem to get it out of my head. So, what better way to show my interest for it then to plaster it onto the biggest piece of artwork in my living room? 


3) Peel off the back and stick. Make sure you place them exactly where you want them because this is where the letters are going to stay. To make sure that everything was straight and I will have piece of mind, I measured out the centre of the frame and made sure everything was aligned right. I would highly recommend doing this as well because if your anything like me, the slightest offset will totally ruin the final project. So, to avoid being displeased with what you come out with, just take the time to make sure everything is in it's rightful place. Once you've done this all that's left to do is paint! I used my large brush to paint over the whole middle and the small brush to get the corners. 


4) Peel away! Now for the fun part. Once the wait for the never ending paint to dry is over, slowly start to peel back the corners. If everything has worked out the way it should there will be a nice clean line where the foam used to be and where the paint starts. You'll also want to peel the letters off slowly because you don't want to rip off or damage the background picture you've been trying so hard to preserve. When it is all done you will have a brand new masterpiece for you and your friends to enjoy. 


And that is it my friends, a simple solution to a rainy day problem.

This is the original blog from which I found the idea. Have a look!
http://abeautifulmess.typepad.com/my_weblog/2011/08/song-lyric-wall-art-diy-project.html


X
Sarah